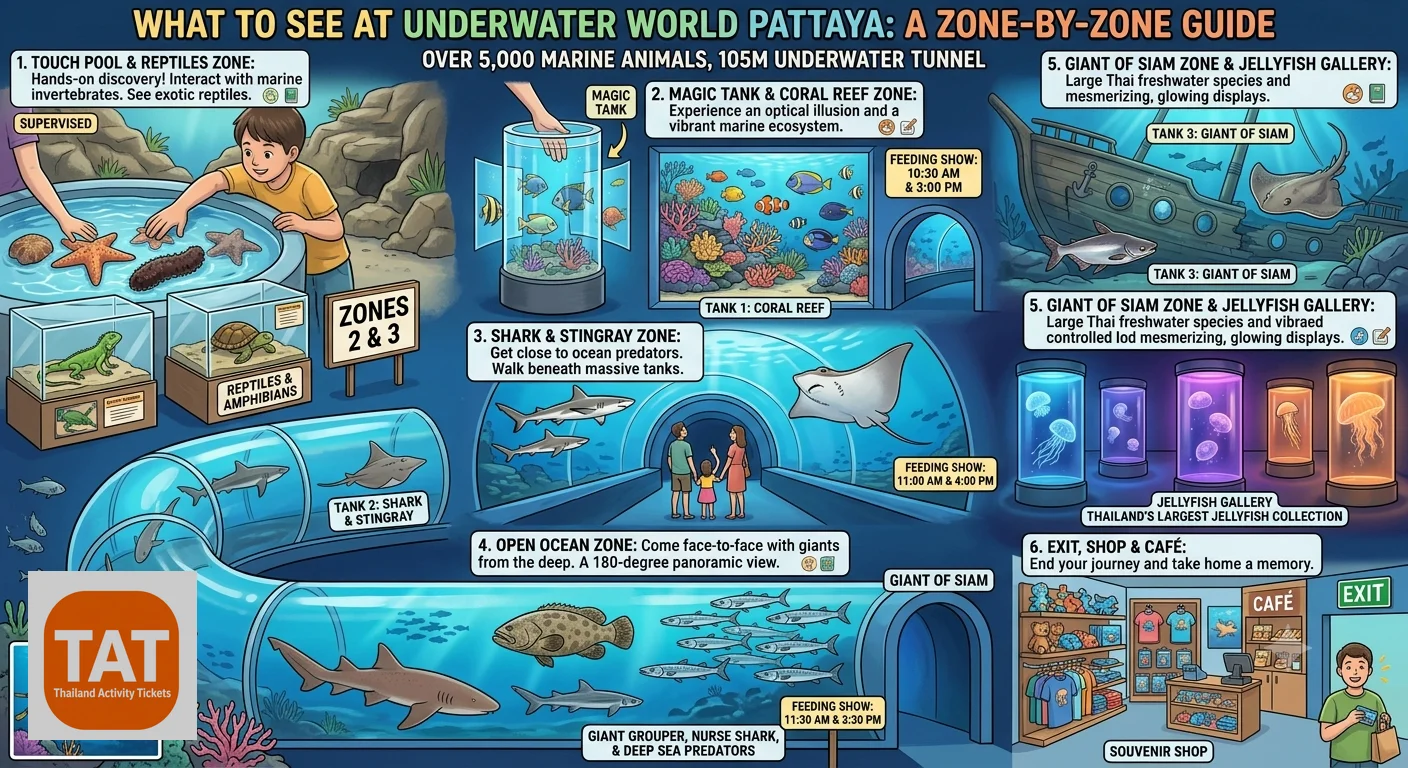
What to See at Underwater World Pattaya: A Zone-by-Zone Guide
A zone-by-zone look at Underwater World Pattaya — what to see in the shark tunnel, feeding show times, and the best photo spots inside.
Underwater World Pattaya packs five distinct zones into a visit that most people finish in under two hours, which means it's easy to walk through quickly and miss half of what's worth seeing. This guide goes zone by zone — what's actually in each one, what to look for, and where the feeding shows and photo opportunities line up — so you know what you're walking into before you go. (Still deciding if it's the right fit for your trip? See how it compares to a full water park day in our Underwater World vs Columbia Pictures Aquaverse breakdown, or browse more indoor Pattaya options for hot or rainy days.)
Coral Reef Zone: Start Here
The visit opens in the Coral Reef Zone, a recreation of Thailand's tropical reef ecosystems filled with colorful reef fish swimming among coral displays. This section doubles as an introduction to marine conservation, with signage explaining the reef systems found in Thai waters. It's a gentler, brighter start to the visit before the tunnel's darker, more dramatic lighting — a good spot to let younger kids get used to the aquarium's pace before the main event.
What to look for: Clownfish, tangs, and other reef species set against live coral displays, plus the educational panels on Thailand's reef conservation efforts.
The Underwater Tunnel: The Main Event
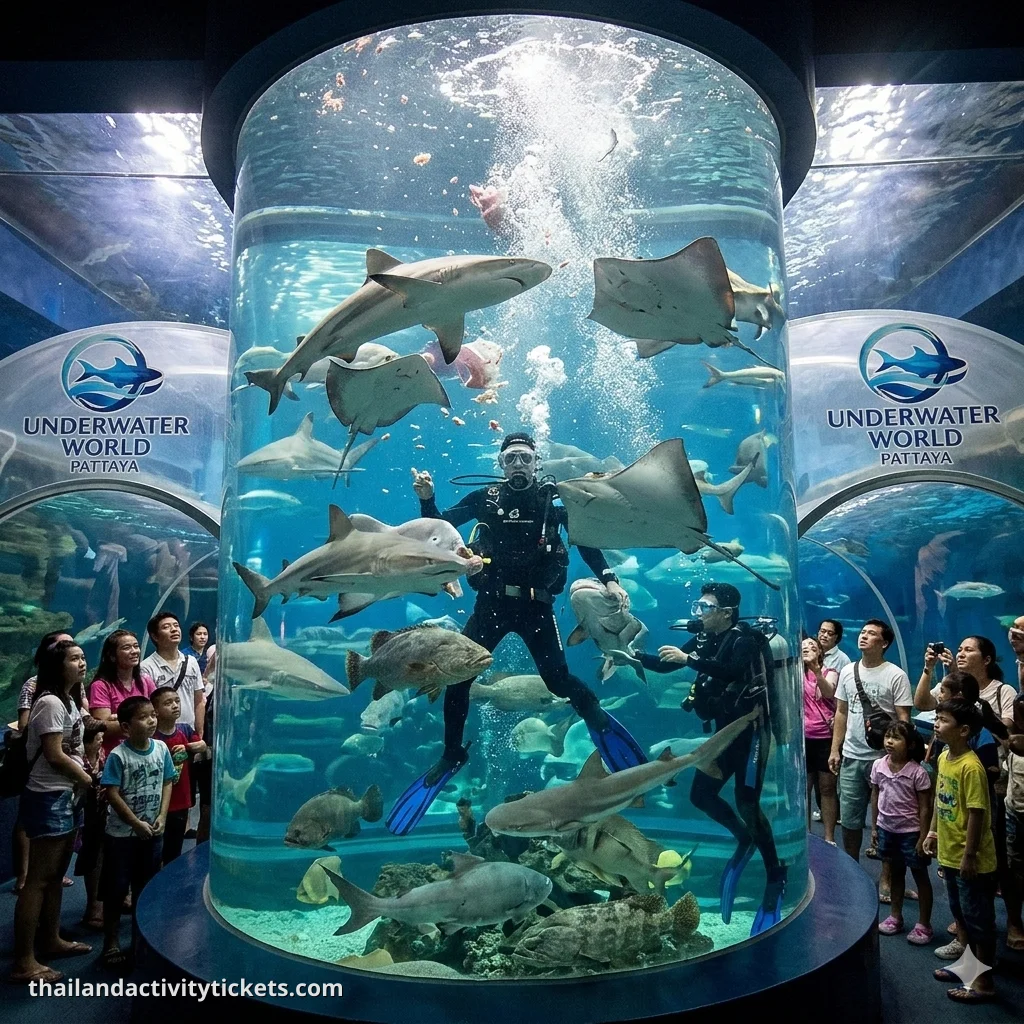
This is what most visitors come for. The 100-meter acrylic tunnel runs beneath the Open Ocean Zone, giving a 180-degree view of sharks, stingrays, and giant fish swimming directly overhead. Blacktip reef sharks are among the most commonly spotted species gliding past, along with large stingrays that pass close enough to see their full wingspan from below.
Budget around 25 minutes here — it's tempting to walk straight through, but the tunnel is also where the shark and stingray feeding shows take place, so lingering near the middle section (rather than rushing to the exit) puts you in the best position if a show starts while you're there.
Best photo spot: The midpoint of the tunnel, where the glass curves overhead and gives the fullest sense of the 180-degree view — arrive slightly before a scheduled feeding show for the added movement in your shot.
Feeding Shows: Check the Board First
Feeding shows run on a schedule that's posted at the entrance, and they're included with standard admission rather than a separate add-on. A diver enters the main tank and feeds the sharks and rays while providing live educational commentary, which is as much a highlight as the visual — you'll learn more about the specific species on display here than anywhere else in the aquarium.
Practical tip: Check the feeding show schedule board right when you arrive (it's part of the standard itinerary flow) and plan your pace through the Coral Reef Zone so you reach the tunnel around show time rather than well before or after it.
Giant of Siam Zone: Thailand's River Giants
After the tunnel, the Giant of Siam zone shifts focus to freshwater species, featuring some of Thailand's largest native river fish, including giant catfish and arapaima. This section tends to move faster for most visitors since it's a shorter walk-through, but it's worth slowing down here if you're interested in freshwater conservation — many of these species are significant in Thai river ecosystems and less commonly seen than the reef fish and sharks earlier in the visit.
What to look for: The sheer scale of the giant catfish and arapaima, some of the largest freshwater fish on display anywhere in the region.
Touch Pool: The Interactive Stop
The touch pool is consistently one of the most popular stops for children, allowing supervised, gentle interaction with selected marine species. Staff are on hand to guide how to touch the animals safely, and this is typically where families with young kids spend the most unplanned extra time in the visit.
Practical tip: If you're visiting with kids, build in a few extra minutes here rather than treating it as a quick pass-through — it's the one zone where the pace is genuinely dictated by how long your children want to stay.
Jellyfish and Rare Marine Species
Toward the end of the route, a smaller zone showcases jellyfish displays and other rare marine species under specialized lighting that makes them glow, creating one of the more visually striking, if brief, stops in the aquarium. It's easy to walk past quickly since it comes near the exit, but the lighting design here makes it worth a deliberate pause, especially for photos.
Best photo spot: The jellyfish tanks under their special lighting — a strong closing shot if you're documenting the visit in order.
Suggested Pacing for a 1.5–2 Hour Visit
- 10 minutes — Arrival, check the feeding show schedule board
- 20 minutes — Coral Reef Zone
- 25 minutes — Underwater Tunnel (time this around a feeding show if possible)
- 15 minutes — Giant of Siam Zone
- 15 minutes — Touch Pool (longer if visiting with kids)
- 15 minutes — Jellyfish Zone and souvenir shop before exiting
Explore Destinations
Frequently Asked Questions
Show times are posted on a schedule board at the entrance and can vary by day, so it's best to check on arrival and plan your route through the earlier zones to reach the tunnel around show time.